Easy Mini Planters
- Matt Brooke
- Aug 17, 2019
- 4 min read
Today's project started off as me being bored for a few minutes and before you know it, I had the saw out and made this plastic planters look a lot more interesting. In true mattdoesdiy style this has been very cheap and looks pretty neat I hope you agree. Using reclaimed materials and a cheap bag of screws, each one I'd estimate has cost no more than £1.50

What you will need
Building Materials
Wood Planks - I used reclaimed decking boards 120mm wide. How much you need will depend on your plastic pot but this project used around 1.5m of board per planter. My local DIY supplier sells it new for around £2.50 per metre so a 1.8m plank would cost around a fiver
Screws - I love 65mm decking screws and use them for most of my outdoor projects. This simple design needs 16 screws per planter. I bought a bag containing around 150 for £3.75 from wilko. I can't recommend their "Pick n Mix" Screws any more highly!
Plastic plant pot - I was using one I already had with plants in but these can be purchased for around £1 in hardware stores or supermarkets
Tools
Mitre Saw - This can be easily swapped for a hand saw it will just require a bit more time and effort. If using a hand saw I highly recommend using a mitre block to help keep the cuts square
Table or circular saw - This isn't essential but does save quite a bit of time compared to sawing using a hand saw.
Tape Measure
Pencil
Set Square
Screwdriver, preferably electric
Drill with a 3 or 3.5mm drill bit suitable for wood
How to create the planter
First step with any project should be to gather the materials you'll be using together. For me that was a case of grabbing the tools I needed, a plank of wood and a box of screws. Right we're ready to start!
Word of warning: In my professional life I know failing to plan is planning to fail. This project ignored that good advice and I made a few mistakes on the way. I know measure twice and cut once is also excellent advice, I just tend to rush things sometimes. Try and take your time and you hopefully won't repeat my mistakes and waste good materials.
Step 1

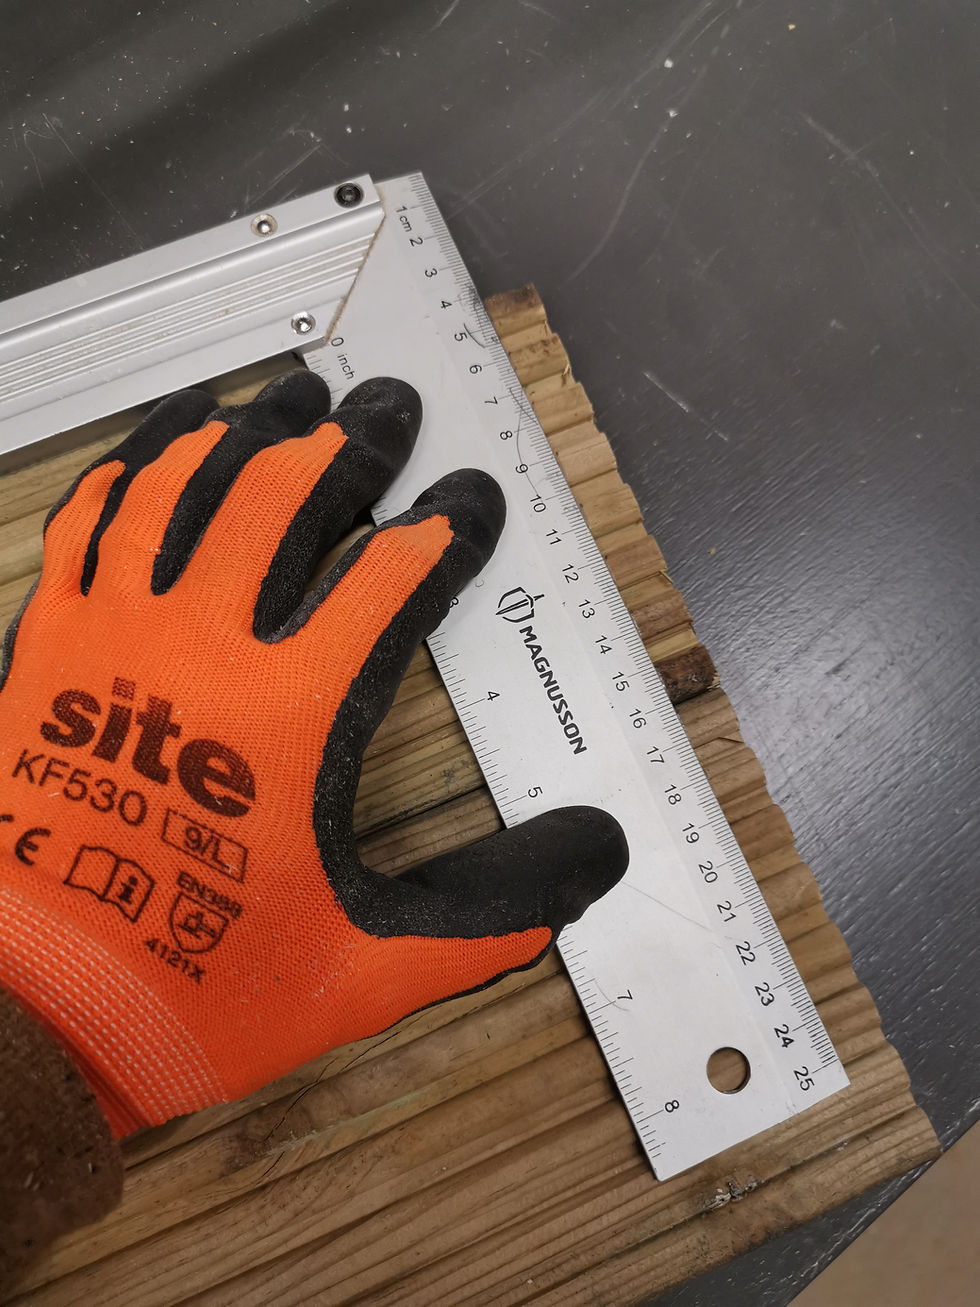
Measure the planter you are going to sit inside of your wooden housing. Once you're happy you know the width, height and depth, do it again just to make sure and write it down somewhere. I measured under the lip of the original plastic so it would sit on top of the planter
Step 2

You will next need to cut the decking board to fit round your planter. I chose to overlap the short boards (after realising I needed to do this). To show you what I mean, each board was made of wood 2.5cm thick. The width of the planter was 38cm across the face and 18cm deep across the shorter side. Therefore I needed two pieces of wood 38cm long and two pieces (18cm + 2.5cm + 2.5cm) = 23cm long. To make the feet I needed an extra piece which I'd cut in half also 23cm long
Step 3
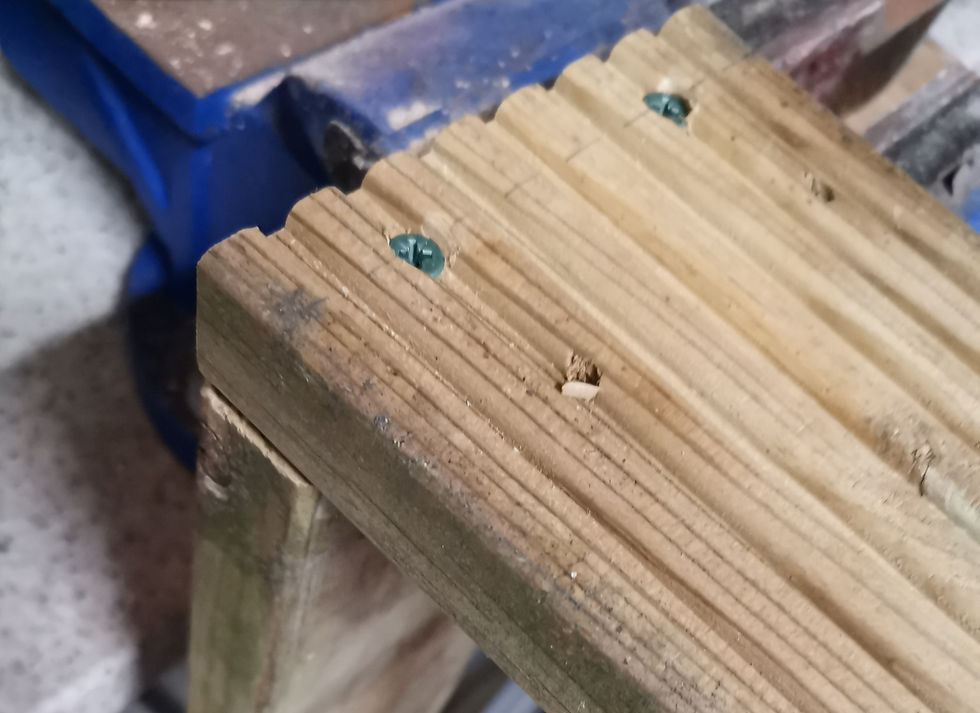
Next job really should be marking out where the screws will be going. Whilst you can sometimes skip drilling pilot holes, I'd recommend against it to avoid splitting the wood. As I made the short planks longer than the depth of the plastic pot, those are the ones the screws will be going through first. So out comes the set square and I mark a line 12mm from the short edge of the board on each end and on two of the boards. I then drilled holes using the 3mm drill bit at the same height about 3cm from the top and bottom. For convenience I used the ruts on the board and went for the second one in. Each piece of wood should end up with four holes in.

Step 4
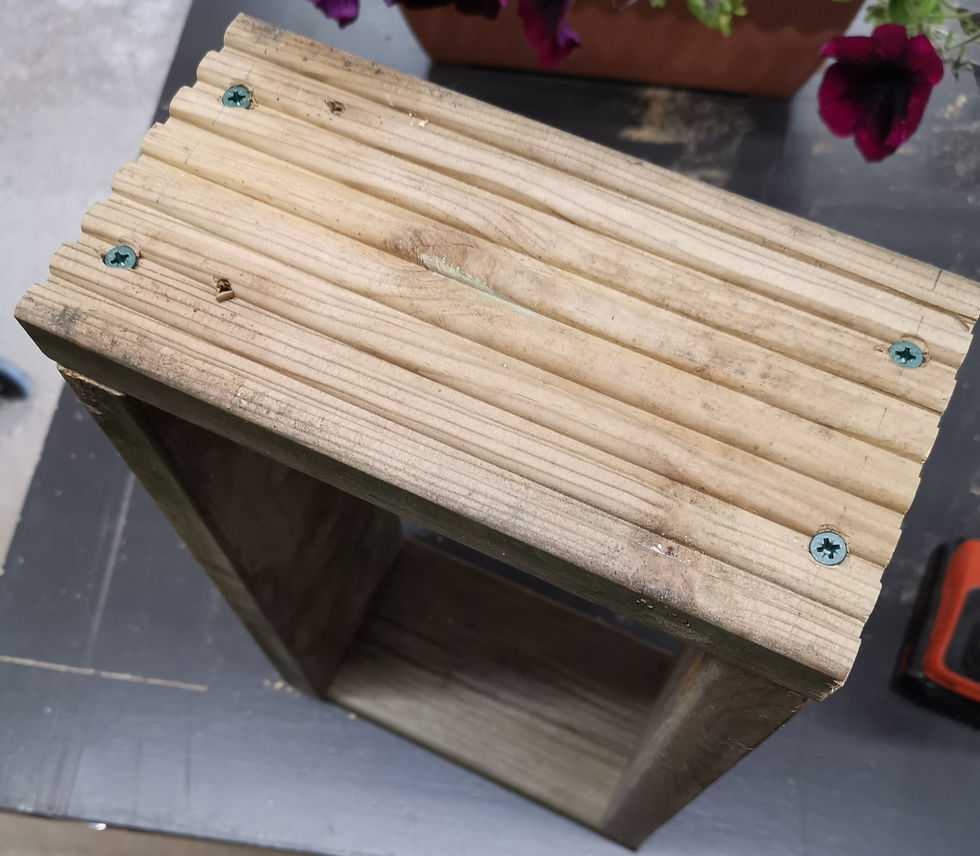
Now for assembly! I used a vice for this but it wasn't entirely necessary, hold the longer piece in place while you screw in one of the shorter pieces on top. Make sure when you're screwing them together they don't leave a gap. Leaning on the top piece when screwing I find is the easiest way. Repeat for the other two pieces to give you two L-Shaped sections.
Step 5
Now screw the two sections together. In my case I'd either misaligned or the timber wasn't entirely straight so I had to clamp the last two pieces in place for me to get the screws in. Don't worry if this happens but you might need to do something similar using a clamp or ask someone to hold the pieces in place whilst you put the last screws in.
Step 6
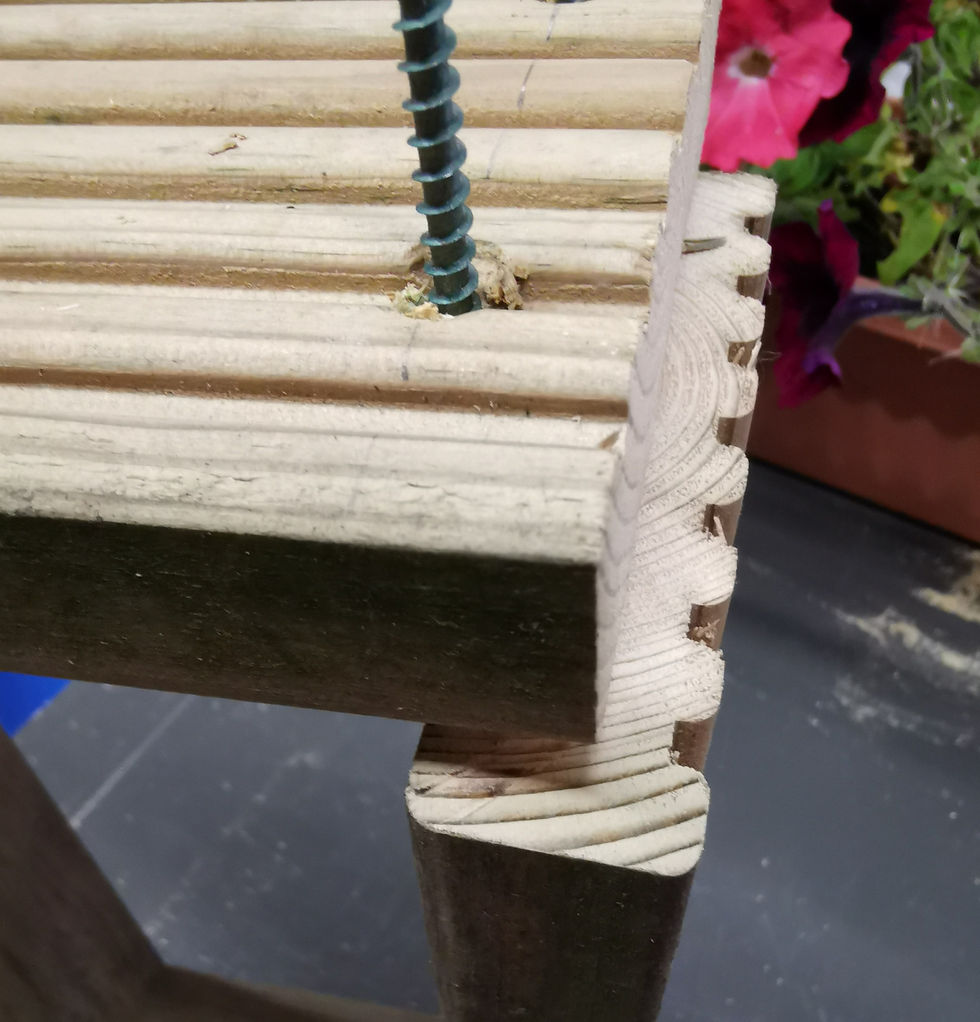
Last but not least, we need to add the feet. Taking the last 23cm long piece I cut it length ways to make the feet. If you don't want to do this, you could just use a whole piece or perhaps some smaller square pieces. The photo shows two ways to insert the screws, the right way and the way I found to be the wrong way. When attaching the feet, make sure the screws aren't going to meet the existing ones, otherwise you face splitting the wood as I did


All Done
So you should now be able to put the plastic plant pot inside your assembly and you can admire your handy work. I did the job twice with it taking about 20 mins the second time once I'd worked out what I was doing. Allow up to an hour depending on if you're sawing by hand or not. You may want to paint or use some form of wood preserver on the wood to stop it rotting in the weather outside. I'm going to have a look in the shed later to see if I have anything suitable left over but I won't be buying anything special for it.


Would love to hear if anyone's done something similar, feel free to use the comments box to share your stories.


Comments